Saturday, October 01, 2011

I'm baaack!!!

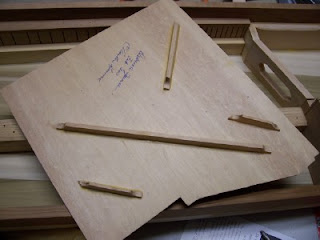
After a lengthy break which involved hunting for a new house, jumping through all the new hoops to get a mortgage, moving into said house, and trying to find some sort of part-time musical employment, life has settled down, and I actually put in a little work on the clavichord.  I'll admit to procrasination and for good reason.  Tiny parts involved, and I felt like all thumbs.  But, a simple procedure, really.  First, in order to make them true butt hinges, I had to whack the little brass darlings that hold the fallboard to the case with a hammer.  Next, I located where to place the hinges by using the blueprint.  Using an Exacto knife, I carved out a little niche on the case and the fallboard in which to nestle the hinges so they would be flush with the wood.


The manual said to use a sharp chisel which "demands care," but let's get real.  I'm not a skilled woodworker.  I have to work small and slow, and a chisel is just asking for trouble.  The little knife did just fine, thank you very much.  I then drilled pilot holes with my Dremel and the #57 bit and screwed four tiny little screws through the hinges and into the pilot holes.  I did a couple of these very successfully, but what a test of patience!  I called in my husband to help hold things steady, and while four hands and a flashlight directed under the hinge so I could see what I was doing did make it easier, it was still tricky.  When I was certain everything lined up and looked just right, I removed the hinges and put them away.  Can't slop Minwax all over the brass now can we...  Anyway, here are a couple more shots of my work.

Tuesday, March 15, 2011

The Stand

Just a quick post to show the clavichord atop the stand.  Ain't it purdy???


The next steps will lead to completion of the case as well as putting my artistic talents to work in creating some art work to identify me as the builder.  I'm looking forward to that!

Monday, March 14, 2011

Stand Assembly

Ah, yes.  The stand for which I fought long and hard.  It was a piece of cake to assemble! The legs, front and back aprons, and side aprons are held together with glue and mortise and tenon joinery.  After sanding the legs and apron with a fine sanding sponge, I did a quick dry run, then applied glue into the mortises (slots carved into the legs and apron) and inserted the loose tenons (little blocks of grooved wood).  When the legs and aprons are all joined up tight, those little tenons don't show.  Not being a woodworker, I'm totally unfamiliar with all these terms and methods of joinery, so I found it all very fascinating and rather gratifying to end up with a neatly finished stand where the wood pieces that contribute to its solidity are completely hidden. Very cool.  Although the manual didn't mention it, I pulled out the clamping blocks and rope that I used to make the case rim. This sucked all the pieces together very nicely.  Here is a picture of the stand with clamping blocks and rope in "dead bug" position while the glue dries.


I ran out of the Titebond glue halfway through, so I pulled out Aleene's original (and trusty) Tacky Glue which I have found to be one of the best glues on the market.  Why I ran out of the Titebond is a bit of a mystery because I had glue to spare when I built my harpsichords.  Although this bottle is much smaller than that supplied with my harpsichord kits, I am theorizing that the winter atmosphere here in Nebraska is so dry, I used more glue because it was setting up so fast!  Quite different from July in Chicago. Nevertheless, I am forging ahead with Aleene's.  I am incredibly happy that Zuckermann came through and finally sent me a complete stand after four years of patient effort.  Thank you, Steve. I am not mad at you anymore!

Sunday, March 13, 2011

The Stand Arrived

Just a quick update here.  It only took four years, umpteen emails to Zuckermann, one anonymous phone call to see if their email was working, and about four months of effort from the Better Business Bureau, but I finally received a complete clavichord stand.  I did an immediate dry run to see if everything was there (oh please, dear Lord, let it all be there because I can't take much more of this), and I am happy to report that I finally have everything I need to construct a very expensive clavichord stand.  I am a happy camper.

Monday, March 07, 2011

A Good Shellacking!

Since the shellac needed to dissolve for at least 12 hours in denatured alcohol, I decided to skip ahead while the alcohol did its thing.  Sooo....

Now comes the case molding.  I don't use miter boxes on a daily basis, nor am I handy with a saw.  But considering my very limited skills, I think I did a decent enough job.  Here's an example of how my mitered corners came out using my fine-toothed Exacut saw.


I plan to fill the tiny little crack with some Famowood #1 Professional Wood Filler in red oak.  I've filled larger gaps and you couldn't tell.  In fact, I've repaired huge chunks and then filed and sanded the molding lines to match perfectly.  This was, of course, on a painted surface, but when the paint went on, not a soul knew, and I sure wasn't telling. The holes left by the nails I used to hold the molding to the case while the glue dried will be steamed shut when I can grab some time.

Then came the "dressing" of the soundboard.  That's fancy talk for wiping on the shellac. After a quick sanding with a super fine sanding sponge block, I took a piece of cheese cloth, dipped it in the shellac, and quickly wiped it on the soundboard.  It just glided on.  


I let it dry for over two hours and then drilled for the hitchpins, slanting the holes against the eventual pull of the strings.  The manual warns to not make the slant too severe so as to pop through the side, so of course I had to do the first one exactly like that.  Oops.  All the others went without a "hitch."  (That's a little clavichord humor.)  I didn't find that job nearly as boring as drilling the tuning pin holes, but of course, the bit was 1/16", and something that small zips through the wood easily.  And I don't believe I was drilling into oak, either! 

Then it was back to the soundboard which was given a second light sanding and a second coat of shellac.  Here's where the clavichord stands as of tonight.


Friday, March 04, 2011

No Chorus Line Here!

Tonight I finished drilling the tuning pin holes.  All I can say is they are not lined up like the Rockettes.  I'm telling myself that it lends "character" to my soundboard.  


I spread this drilling out over three evenings because I found it to be the most boring job yet.  Ugh.  I did not force the bit into that rock-hard oak, but used the weight of my Dremel to sink the bit into the wood 1-5/16" deep.  I went low tech and attached a little masking tape flag to my bit to tell me when I had reached the desired depth. The holes were drilled with an ever-so-slight lean toward the right case wall.  I found I had to do a lot of vacuuming along the way as the drilling generated an unbelievable amount of sawdust. After finishing that ordeal, I pulled out my Swiss Exacut, attached the fine-toothed saw, got my husband's little plastic miter box out and measured and cut the thin soundboard molding.  Easy peasy.  The manual makes a big deal out of how to spread the glue, but I found that a small (craft size) paintbrush worked perfectly to apply the glue along the right angle where the bottom and back of the molding meet.  I used just enough glue to spread out when I pressed the molding into place, holding them briefly while the glue set up. Voila!  Done.


Monday, February 21, 2011

Gluing in the Ribs and Soundboard

The ribs are glued to the underside of the soundboard and positioned by using the blueprint and carbon paper in various ways to eventually end up with rib outlines drawn on the bottom of the soundboard.  At that point, it's a matter of gluing the ribs into position and placing some flat weight on top of them while the glue sets.  I elected to use a square box of stained glass sample pieces and scraps as well as a couple kiln shelves and two five-pound weights.  The box was almost the exact size of the soundboard, so this worked perfectly.  The next evening, I scooped out the ends of all the ribs so they were down to approximately 1/16 of an inch.  My trusty Dremel with a sanding barrel zipped through those ends and made beautiful chamfers - not that anyone is going to see them.  But here are a couple of nice pictures of them.


My husband and I signed the underside of the soundboard and proceeded to glue it in place.  There is a huge difference between gluing in a large harpsichord soundboard in hot and humid Chicago and a small clavichord soundboard in the dead of winter.  Glue sets up fast when the board and the air are dry, so we had to work fast!


To shield the soundboard from being marred by the clamps, I took a wooden paint stick, cut it into four pieces, and used them to pad the surface.  Glue was spread all over the wrestplank, around the liners, and across the bellyrail.  I used spring/pinch clamps (newly purchased just for this application) in the mouse hole, and I used my c-clamps on the wrestplank.  


Along the other edges, I used 1/2x20 nails every three inches or so to hold the soundboard down on the liners.  These were placed close to the edge of the soundboard so that the decorative molding to come would cover them.  I handled the pinch clamps, and my husband handled the c-clamps as well as the nails (I was just no good with them), using our handy-dandy nail set.


All is drying now, and I plan to give it a good 24 hours before attempting to drill the tuning pin holes.

Thursday, February 17, 2011

An "Aha" Moment

At 3:30 in the morning, as I lay in bed fretting about frets, it occurred to me that I might have misunderstood what the manual was trying to communicate. Tapping "toward the bass" could mean one of two things:
  • the bass of the instrument, which would be to the left/west 
  • the bass of the bridge, which would be to the south.
As I was visualizing the strung instrument, I was trying to figure out how in the heck pins would prevent the strings from riding up if they were bent toward the bass end of the instrument. In addition, by tapping in that direction, I was tapping along the grain of the wood and encouraging that crack.

If my musings were correct, instead of left-leaning pins, I should have been trying to create southbound pins, thus tapping against the grain and not encouraging the cracking. After all, the instrument is strung east-west, not north-south like a harpsichord! Doh! I should realize that if I can't make sense of something, it's probably because it's wrong.

A response from the manual's author confirmed all my suspicions.  So now I'll try tapping the pins again, this time in the correct direction and, hopefully, with better success.

The Bridge and Its Pins

This morning I glued the bridge to the soundboard, and it couldn't have gone any more smoothly.  That should have tipped me off on what was to come!  Every winter, we experience the shock of static electricity in the dry air almost every day.  But that's not enough to convince me that my soundboard is dry enough.  Having built my first harpsichord in the humid summer air of Chicago and seeing what a dry winter in Albuquerque's desert climes could do to it, I was taking no chances.  I parked my little soundboard in front of my oven door while I prepared to glue the bridge to it.  I have to say, I got the perfect amount of glue on the bridge, and the little guide holes with their padded nails went right into position without a single slip or misstep.  I nailed the bridge securely to the soundboard, using the bottom of the case as my sturdy work surface and observed the exact amount of glue squeeze I expected to see.  After allowing it to dry to a gummy state, I neatly scraped up the squeeze.  No problemo!  Looks like a million bucks!  

After allowing the bridge to dry about six hours, I tapped in the pins and ran my file across the tops of them to even them up a bit more.  Then the fun began.  The manual says to put a nail set or screwdriver against each pin and give it a tap toward the bass to create a 5-degree bend in each pin.  Huh?  Five degrees is barely a blip on the radar, so how on earth am I to know if I've been successful?  Plus, when I got to the mid-range of the pins, I saw the bridge threatening a hairline crack.  Well, crap.  I took some glue and worked it over the bridge between the pins where I saw trouble brewing.


I set the board aside and proceeded to scour the Internet for a close-up shot of a clavichord bridge.  Nothing helpful showed itself, so I googled the manual's author and dashed off a quick email to him.  I asked for clarification on where and how this bend is supposed to be.  I hope he answers.  

On the next run, I would suggest a decent picture of the bridge with its pins bent appropriately instead of one of the distant shots of a finished instrument where little of any use is seen.  Even a picture of a bridge pin all by itself with its little bend in it would be good.  I am a visual person.  

Tomorrow, I'll forge on ahead with the soundboard ribs.


Monday, February 14, 2011

Why be boring when you can have pizazz?

Happy Valentine's Day!  After the obligatory evening celebrations, complete with flowers, wine, and a little Cherry Garcia,  we settled into a comfortable evening at home.  Such is the cozy life of two people who have loved each other for over 25 years.  Since Harry's Law was the only thing I felt deserved my attention on the television, I concentrated on carving a little curve on the base end of the bridge in the hours leading up to the show.  The little flourish on the bridge was accomplished with the aid of some diamond drill bits from Harbor Freight, my Dremel, and an X-Acto knife.  First, I drew the intended shape with a pencil on the side of the bridge.  Next, I whittled a little dip in the wood, and when I had removed a sufficient amount, I used various diamond drill bits to get down to the intended shape.  Having never carved wood before, I approached this task with more than a little trepidation, but after thoughtfully gazing at the bridge from time to time throughout the day, I finally felt ready to give it the old college try.  The nice thing about the diamond bits and the Dremel is that one does not have to worry about aggressive action from the tools. They are gentle.  Nevertheless, in no time, the feat was accomplished.


I sanded the entire bridge with a fine sandpaper sponge and pronounced it finished.  I won't earn any awards for creativity in design, but I'm a simple girl, and this simple curve suits me just fine.

Sunday, February 13, 2011

The Bridge

What a pain in the neck this is!  Well, part of it.  For starters, I positioned the soundboard under the blueprint, and made little cuts in the paper at the four corners so I could line everything up properly.  I then positioned the bridge on top of the blueprint as accurately as possible and drilled five holes with my #57 drill bit in my Dremel.  I drilled through the bridge, the blueprint, and the soundboard clear through to my work surface, taking care to avoid places where the future bridge pin holes would be drilled.  I managed to do well with two of them.  Three of them are pretty close to where bridge pins would go, so they will get filled later and then drilled to accommodate the bridge pins.  I drove five 3/4x18 nails through the holes. This would allow me to reposition the bridge in the exact same place, sans blueprint, later on.  I then took it all apart and, after placing a layer of Scotch tape across the blueprint where the bridge is drawn, placed the blueprint on top of the bridge and used the nail holes to hold the paper down.  My husband and I smoothed the drawing down, creasing it along the sides of the bridge.  Making a little tap with a nail, I marked the 56 places where I would drill holes for the bridge pins. This is the part of the task that's a pain.  The marks on the blueprint are small, the paper is large and cumbersome and not three dimensional like the bridge, and the area being marked is very narrow.  Tedious is a word that comes to mind.  After that was done, we rigged up the Dremel's drill press so I could drill 56 perfectly straight holes into the bridge at the precise depth needed.  I was doubly careful and also marked the bit with a little strip of masking tape. 
 

Yeah, overkill.  But I don't like to leave anything to chance.  When that was done I called it a day.

Saturday, February 12, 2011

Trimming the Soundboard

Assuming "the soundboard will have to be trimmed" means "do it now," I set out to trim it down to size.  The instruction manual does not offer any hints on how one might accomplish that, so, taking no chances, I elected to use a cardboard template, an X-Acto knife, an Exacut with the wheel cutter attachment, and sandpaper.  The first thing I did was trace the shape of the soundboard onto a piece of cardboard and cut it out.  At that point I was able to slowly trim the straight "north" and "east" sides of the cardboard until it fit the case perfectly.  I then laid the cardboard template on the spruce soundboard and drew lines where the soundboard needed to be trimmed.  Laying a long metal straightedge along the line on the right ("east") side of the board, I cut a scoring line with the X-Acto knife. 


This cut went across the grain, so after cutting a good deep score, I switched to my Exacut with the wheel cutter attached to it and deepened the cut until it went through to the bottom.  Perfect!  I repeated the routine on the top, or "north" end of the board.  Since I was cutting with the grain, this took a fraction of the time.  The board was still (purposely) a hair too large, so I sanded the two edges until it fit perfectly.

Confession time.  When I glued the long hitchpin rail, I didn't notice that it was a fraction too long.  Two possible remedies:  try to trim/sand it or cut a small notch in the soundboard to accommodate it.  I chose the latter, and it looks fabulous!


Wednesday, February 09, 2011

The BBB rocks!

You've got to wonder if the Better Business Bureau's suggestion that I seek legal counsel had an effect.  Suddenly, three months after they were last contacted by me (four years since initial contact) and two months after they were first contacted by the BBB, Zuckermann decided to respond. They are claiming I never answered their emails and that their policy clearly states how missing or incorrect parts are handled.  They apparently are awaiting return of the parts I do have for inspection and replacement.  So, I merrily shipped them off today to Stonington, Connecticut.

Ya know what?  I'm just so happy that I finally got some action on this, I'm not going to play the blame game.  If they want to put the onus on me, I'll be magnanimous and let them.  How did Phil Collins sing it?  "I don't care anymore."  Just send me my blasted stand!  If it ever arrives, my whoop will be heard for miles!

Tuesday, February 08, 2011

The case is finished!

Well, except for decorative molding.  The final step was to mark the hitchpin rails and glue them into place.  The manual describes a rather silly (to me, at least) way of marking these rails by placing the blueprint over the pieces and then "feeling" them into proper position.  My word, not theirs.  I simply cut out the rails from the blueprint, thus creating a template to lay neatly and cleanly over the wood.  If Zuckermann were smart, they would include separate templates for this purpose.  It would cost them less than 10 cents.  I marked the rails with a pointed tool, 


and then I taped the cutouts back into the blueprint.  Actually, before I began the project, I went to our city hall and had them run a copy of the blueprint on one of their big machines designed to do just that.  Eventually, I hope to have enough money to have it professionally framed or mounted because it would make a cool piece of wall art.

Following the manual's directions, I took my #57 drill bit, a skinny little hair of a bit, and drilled through three of the holes in the bass hitchpin rail and six of the holes in the longer hitchpin rail.  I made up some padded 3/4" nails with the provided cardboard squares, two per nail, applied glue to the bass rail put it into place and used the padded nails to clamp the rail down.  I did the same with the long rail.  The manual didn't point out that one should not center the nails on the pads because the holes on the long rail are not centered. The cardboard will actually push the rail away from the spine, even if it hangs over as little as 1/64", so that little tidbit, as obvious as it may seem, is worth a mention. The holes in the long rail are so close to the spine, it's a real challenge to drive the nails in, even using a nail set to get your hammer above the rim of the case. Nevertheless, I gave it my best. Here is the result.

When the glue is dry, I'll cut off the cardboard, remove the nails and move to the next task which will be fitting the soundboard.


Saturday, February 05, 2011

Promised Pictures

The majority of the case joinery is done.  All that is left is marking the hitchpin rails (made from cherry wood) and then gluing them down.  The following pictures may resemble several of my dry run pictures (as you would expect), but the difference is that all of the "guts" are now glued permanently into place.  Here's the whole magilla:


This is the pesky middle belly rail that had me a bit concerned.  Further down the road, we'll see if my worries were for naught.  This picture is shot from the bass end toward the treble.

This picture shows the right cheek with its liner and the middle bellyrail, this time shot from the treble end and looking toward the bass end.  That little piece of wood to the right of the bellyrail is the back bellyrail.  If you look closely, you can see the chamfer I carved in the rear liner.

Below is a shot of the tool box.  The lid fits very snugly indeed, so I may end up sanding it a tiny bit.  For now, it is sitting off to the side.


And finally, here is a picture of a bead of glue I ran down the seam between the belly rail and the cheek - just because.  It will dry nearly invisible.

So there you have it.  Dare I think I could have the entire instrument finished by summer?

Friday, February 04, 2011

Progress!

This evening involved a lot of gluing and clamping.  The back soundboard liner and rear bellyrail were glued into place as well as the front soundboard liner (although the manual neglects to tell you to do this) and the right cheek liner.  The only glitch, which is mildly concerning at the moment, is an ill-fitting middle bellyrail.  I had to sand the rear bellyrail down a bit (where it meets the spine) to get the middle bellyrail to fit at the correct angle.  I did not want to mess with sanding an angled surface.  It is entirely possible that the balance rail shifted a 16th of an inch when we were gluing and drilling, thus throwing the fit of the middle bellyrail off just enough to not fit properly.  It is the only piece that is not yet glued into place due to the fact that everything else needs to set up and dry before I tackle that.  I am hoping that a few taps with the rubber-tipped side of my stained glass hammer will be enough to bring it into line.  If not, I dunno...  At any rate, the light at the end of the tunnel known as Building the Case is within sight.  As soon as I get the middle bellyrail in place, I'll post a picture.

Wednesday, February 02, 2011

My Ever-Expanding Vocabulary

The next step in my clavichord project is to glue the cheeks into place.  In reading the manual, I ran across a few words in this section that are not in this musician's everyday vocabulary.  Hemidemisemiquaver I understand; arris, not so much.  I offer definitions here in the event anyone reading might also benefit from a little enlightenment.
Dado:  a slot or trench cut into wood.
Lap joint:  This is formed when you overlap pieces of wood and fasten them together so they are flush and the surface is smooth and continuous.  This assumes, I would think, the presence of a dado matching the width of the second piece of wood.  I may be incorrect, but I'm trying to make practical sense of the new words (practical, as in, use it in a sentence).  If you google lap joint, you will see many images that I believe confirm my assumption. 
Arris:  This is an architectural term that describes the sharp edge formed by the intersection of two surfaces.  I actually have an entertainment center constructed in Arts and Crafts style.  The side panel and front panel are joined by a solid leg of oak.  The 90-degree corner of that leg forms an arris, a sharp edge, into which a chamfer is carved, much like what I carved into the rear liner a while back, albeit a bit fancier.  And wouldn't you know it?  The manual suggests a chamfer be made on the inside arris of the rack to eliminate any glue bumps so as to ensure a tight fit when everything is glued into place.  I've been pretty darn neat with my gluing, so this additional chamfer may not be necessary.  We'll see.  I'm off to glue my cheeks.  That didn't come out right, but it is what I'm about to do.

Tuesday, February 01, 2011

Zuckermann and the Better Business Bureau

I received an email from the Better Business Bureau updating me on my complaint against Zuckermann.  They report contacting the company on multiple occasions, but, to date still have not received a reply.  As a result, have closed my complaint as a "no response," which will be reported to the public for the next three years.  They have suggested I consider filing an online complaint with the Connecticut Attorney General's Office or with the Connecticut Department of Consumer Protection. They also suggest I consider legal means.

My immediate response is to once again warn people about Zuckermann's business practices.  They cater to a niche market, so if one is inclined to build an early instrument, their designs are certainly going to need your consideration.  My only advice is to pounce on the kit as soon as it arrives and do a dry run immediately.  As soon as you know what is missing, you'll need to contact them ASAP and hound them for the missing parts.  They don't whine about little things that need to be supplied, but in my experience, they don't hurry to correct the problem.  In my case, it took them 10 months to send a small envelope of bridge pins that were not included.  If anything big is missing, be prepared for a battle.

I'll be back to the building fun in a day or two!  Stay tuned.