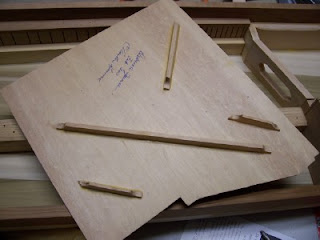
My husband and I signed the underside of the soundboard and proceeded to glue it in place. There is a huge difference between gluing in a large harpsichord soundboard in hot and humid Chicago and a small clavichord soundboard in the dead of winter. Glue sets up fast when the board and the air are dry, so we had to work fast!
To shield the soundboard from being marred by the clamps, I took a wooden paint stick, cut it into four pieces, and used them to pad the surface. Glue was spread all over the wrestplank, around the liners, and across the bellyrail. I used spring/pinch clamps (newly purchased just for this application) in the mouse hole, and I used my c-clamps on the wrestplank.
Along the other edges, I used 1/2x20 nails every three inches or so to hold the soundboard down on the liners. These were placed close to the edge of the soundboard so that the decorative molding to come would cover them. I handled the pinch clamps, and my husband handled the c-clamps as well as the nails (I was just no good with them), using our handy-dandy nail set.
All is drying now, and I plan to give it a good 24 hours before attempting to drill the tuning pin holes.


