The listing cloth is woven between the pairs of strings and serves several purposes:
- prevent the tail of the string (the "unwanted" part of the string) to vibrate, i.e., sound, when the tangent strikes it
- stop the entire string from vibrating when the key is released and the tangent leaves the string.
- affect the tone
- provide some stiffness to the action of the keys.
The trick is to get the weaving just right and find that "Goldilocks zone" that is neither too tight or too loose, but just right. Too tight and you will have "drumming" (caused by action noise), tight tone, and small tone. Too loose, and the damping action of the cloth will be inadequate causing the tone to "leak." The strings will continue to vibrate and sound when you don't want them to do so. The touch will be spongy, with the key having too much "give" as the tangent touches the string. In short, one has to play around with it a bit: weave, test, undo, try again.
And as the manual explains, all of this is also a matter of personal taste. What feels and sounds good and right to one player may not appeal to another player.
Weaving the listing cloth started in the bass, about ten pairs up (roughly two inches) and away from the keyboard. I left a couple inches of cloth dangling down, (it doesn't show) and began weaving the pairs, toward the keyboard. The temptation is to weave as one might do when quilting, running the end of the cloth up and down between several pairs at a time. While it's faster, it won't work. I tried (even though the manual said don't do it). So, of course, I had to do it. Just once. Just to see. What happened was that as I progressed, the cloth pulled the pairs of strings ever closer to each other until some of the pairs were all but touching. And that's a problem, of course. So I undid it, and wove each pair individually, as instructed, bringing the cloth below and above each pair and drawing it completely through before progressing to the next pair. After I did the first row, I pushed it snugly to the left to lock it securely in place and then started weaving the next row of pairs, this time weaving away from me. The pairs that had the listing cloth on top in row one now have the listing cloth on the bottom in row two.

I carefully watched how close the listing cloth was coming to the tangents, ensuring I stayed at least one inch away from them so the action wouldn't be too spongy or cause drumming. I relied heavily on the photos supplied with the manual to determine how many pairs to weave before I reversed direction. According to the images, sometimes the listing cloth was quite far from the tangent. I didn't question this, but just copied what I saw.

As I neared the top of the keyboard, it was no longer possible to weave without butting up against the tangents, so I brought the cloth up and tacked it to the frame of the instrument. I left some length and looped it under, just because I wanted to play it safe in case I ever decided to loosen the weaving and would need a little extra length.
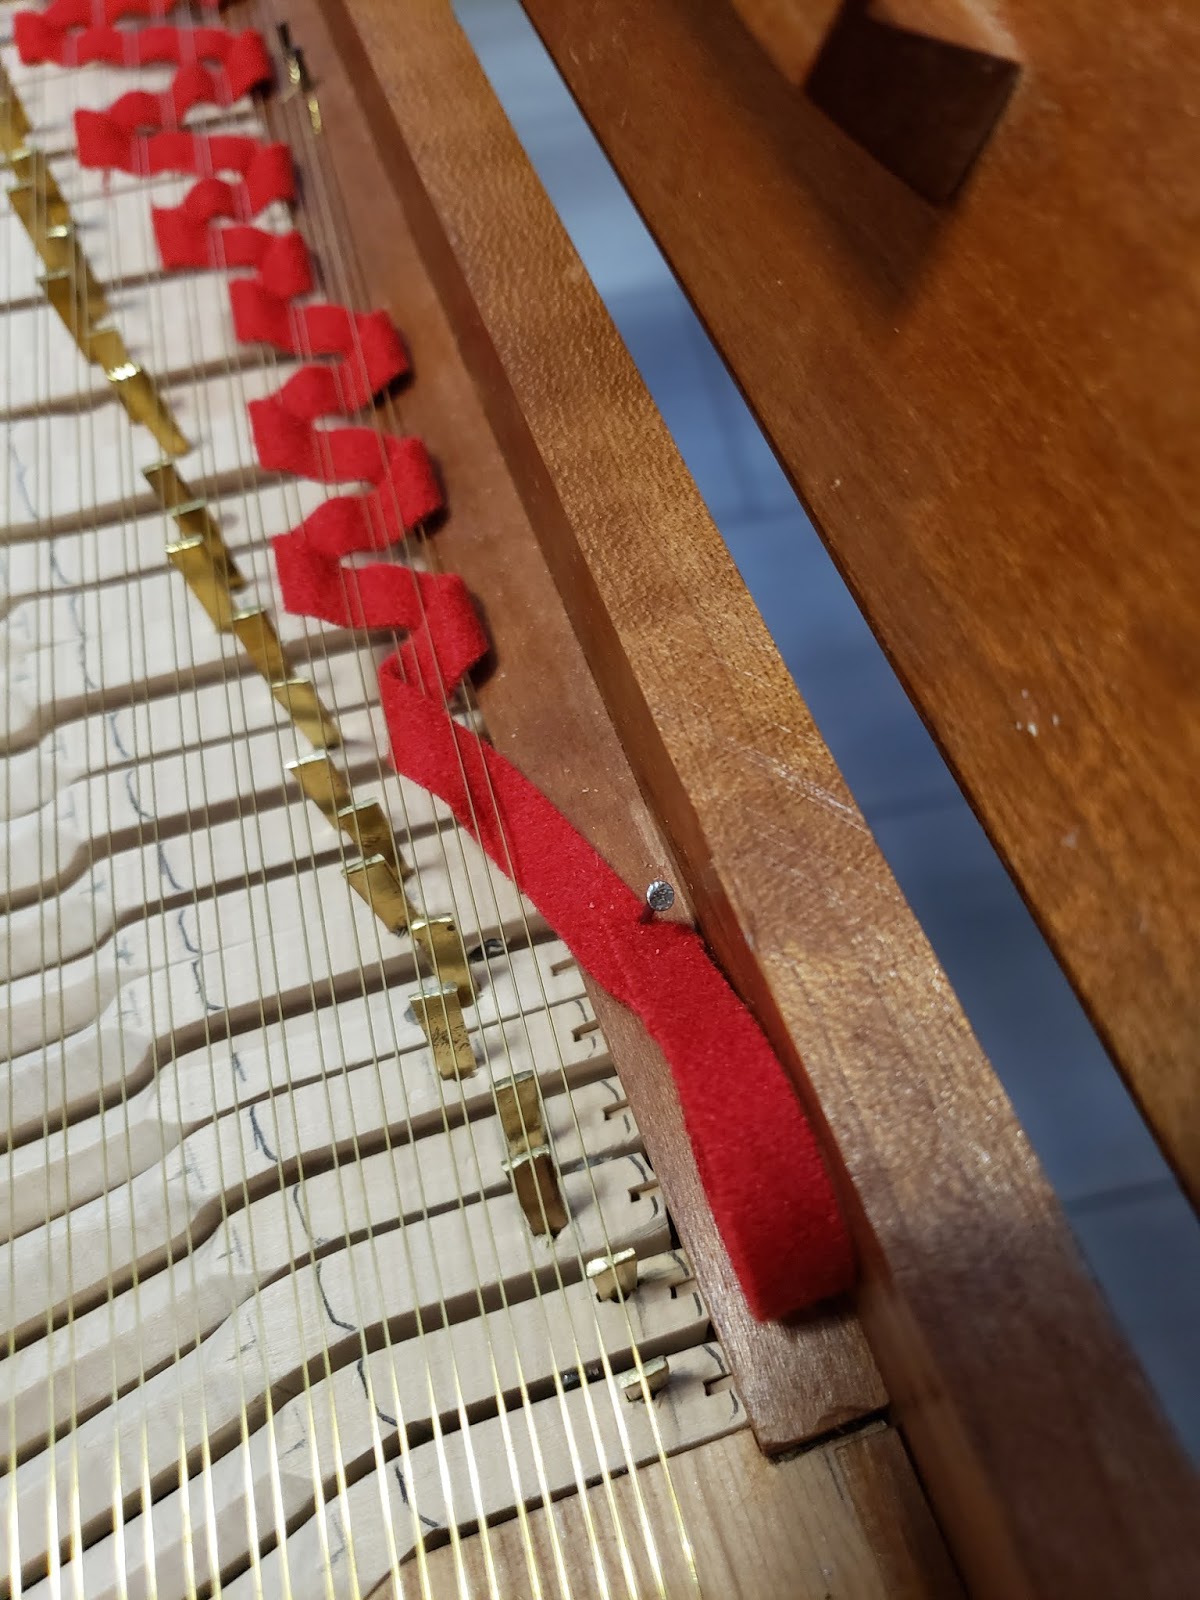
Here's a picture of the entire length of the listing cloth in place.

Now that the listing cloth is done, I reattached the lid and fall board and slid the nameboard into place. The nameboard is quite snug, and I'll ponder this as I take the next steps in completing the instrument and perhaps revisit it.

The string provided to hold the lid open was nothing more than plain string wrapped in some fine gold-colored filament or casing, which just didn't hold up. The pic below showing the string was taken earlier in the project.

I decided to substitute some 20-pound red hemp cord that I had on hand. It has good tensile strength, doesn't stretch, and holds the lid quite firmly.

At some point, when I'm sure everything is holding as needed, I'll trim that little tail off. I like the way the hemp coordinates with the red listing cloth.

Up next will be chipping to pitch. Stay "tuned" (musician-type joke) for more.