Tuesday, March 10, 2009

Fahrvergnuegen!


The official color is charcoal blue pearlescent. It's a 2004 diesel Golf, and I plan to run it on fast food restaurant oil. So eat them French fries and help the effort!

I purchased the car from a dealer in Gainesville, Florida, so to pick it up, a road trip was in order. Any excuse to thaw out, right? We picked up the car and drove along the southern coast, then spent a day in "Nawlins," eating etouffee, touring the French Quarter, and walking the river walk. Later we pigged out on beignets at Cafe du Monde (but of course). Then it was on to Ft. Worth to visit family.

When we got within 4 hours of home, the weather turned sour, and Old Man Winter reminded us he wasn't through with us yet. We've been freezing ever since.

Anyone out there from Tallahassee? I love that town and may need to retire there, although I've heard the heat and humidity are awful. I'll have to return during the summer months to see how well I like it then. As for March, it was perfect!

Tuesday, February 10, 2009

The deed is done!


The auction is over, and the Audi is soon to have a new home in Ohio. The winning bidder has 15 other diesel vehicles in his possession, so Old Blue is going to a good owner, I believe.

Now that I've sold three of our four existing vehicles out from under us and the remaining car is 300 miles away from us in our son's possession, I guess we better start looking for a couple cars.

My son wants a Rabbit. I could go for that, but a Jetta wagon would also work. Manual transmission is a must. Diesel is not a requirement, but it would be nice. If you have one for sale, drop me an email!

Monday, February 02, 2009

Farewell to an Era


I am not a car person. At least I didn't think I was until now.

For a variety of reasons, we have decided to clear the decks and sell our three oldest vehicles. As I write this, the heart-breaking realization has come to me that the oldest of the three - my beloved 1982 Audi 4000 diesel - has been with me half my life! But more on it a little later.

The first to go is a 1987 Dodge Ram Van. This was given to us by my mother-in-law. I've never cared for it because it's a behemoth. It has a high profile, and I've always been a nervous wreck when driving it. So when it got a bid at eBay Motors, I cheered.

The next car we listed was my husband's 1987 Volkswagen Fox wagon. When we married, my husband became a co-owner of a house I already owned, so the car became our first major purchase together. Our son, who is now a university sophomore, became the car's primary driver/owner about three years ago, but it has a fussy 4th gear, so we listed it on eBay Motors as well. Warts and all, it got a bid almost immediately. While my husband and son really enjoy the car, they realize it is time for it to go to someone who can tinker endlessly with it as it ages further.

The third and final car we listed is my Audi.

This is a gem of a car which I bought new back in early 1982. That makes it 27 years old. That car has been with me for half my life, and I still love it. Sure, the driver's seat needs to be restuffed. But the upholstery is still in great condition.

The odometer doesn't advance with consistency. It tends to lock up in warmer weather. It advances more readily in cold temperatures, which makes it a remarkable car. Imagine! A diesel that likes cold weather!

I have had the left front fender totally replaced to arrest some rust.

The car has been in three fender benders - one of which totaled the little Ford that hit me. The offending driver was an insurance salesman, so everything was fixed by his company to my satisfaction. He hit the right front fender, closest to where my infant son was asleep in his car seat. But my little baby didn't even wake up from the impact. Old Blue (and the car seat and seat belts) got between us and the other car and protected us.

The 1982 Audi 4000 diesel was, and still is, a solid car. My husband affectionately refers to it at times as The Tank. It currently has seven bids with a few days to go, and I'm using the remaining time to come to peace about the sale. I'll probably replace it with something lame while I patiently wait for Audi's release of their 2010 clean diesel vehicle.

Fond memories of this car. I do love it.

Tuesday, October 14, 2008

Another organ excursion


This morning, I was off to Episcopal Church of Our Savior, again in North Platte, Nebraska, to play a cute little German Baroque Snyder-Neuman of 9 ranks. It is serviced by Darrow Pipe Organ of Onawa, Iowa. The church's organist is Naomi Getty.

Here's the stop list:

Pedal:
Sub Bass 16'
Flute 8'
Brustwerk to Pedal 8'
Brustwerk to Pedal 4'
Hauptwerk to Pedal 8'

Brustwerk:
Koppelfloete 8'
Salicional 8'
Prestant 4'
Hohlfloete 4'
Nazard 2-2/3'
Siffloete 2'
Haubois 8'
Tremelo

Hauptwerk:
Prinzipal 8'
Rohrfloete 8'
Halb Principal 4'
Grave Mixture II
Hauptwerk to Hauptwerk 4'
Brustwerk to Hauptwerk 8'

The organ has 6 generals, chimes, and a delightful 11-bell Cymbelstern. The pipes were made in Holland.

This church burned in the late 1950's or early 1960's and was rebuilt and ready before the pipes for the new organ were completed. Installation was in 1964-1965.


The tower bells are named after the evangelists:
The largest is St. Mark (D). It is the big one because "Mark was the first evangelist." Next is St. Matthew (F), St. Luke (G), and St. John (A). The bells ring at 8:30 a.m., 12 noon, and 5:00 p.m. daily.

Wednesday, October 01, 2008

Eine kleine Orgelmusik

Today, I visited Our Redeemer Lutheran Church here in North Platte, Nebraska, and played their marvelous Bedient tracker organ. This bright little instrument is Opus 6 and was their first tracker. Built in 1973-74, it was recently rebuilt/refurbished in 2006.


Here is the stop list:

Great, 56 notes
Principal 8
Rohrflote 8
Praestant 4
Octave 2
Sesquialtera II
Mixture III-V
Trompet 8


Pedal, 30 notes
Subbass 16
Octave 8
Octave 4
Nachthorn 2
Fagott 16
Trompet 8

Swell, 56 notes
Gedeckt 8
Spitzflote 4
Principal 2
Quinte 1 1/3
Cymbal III
Regal 8

Couplers
Great/Pedal
Swell/Pedal
Swell/Great
Tremulant

This organ cost $24,000 when it was installed in 1974. I hate to think what it would cost today.

I decided to play a little Buxtehude, Ach Herr, mich armen Suender (always good to focus on how sinful you are when you are in a Missouri Synod Lutheran church) and his Passacaglia, which I just love to play! I also played a couple selections from Frescobaldi's Fiori Musicali, namely Per la Messa <> (Cum Jubilo), Toccata avanti la Messa della Madonna, a kyrie or two, and , Toccata per l'Elevatione.


Rumor has it the organists at this church are not paid. My guess is the organists pay the church for the privilege of playing this delightful instrument.

Monday, September 29, 2008

Flowers Ancient and Modern


These Gerbera daisies bloomed all summer long in my garden and continue to bloom through the autumn.

Daisies are the friendliest flower, or so says Meg Ryan in You've Got Mail.

They're also an ancient flower, judging from the fact that Chaucer wrote of them back in the 14th century:


Of all the floures in the mede,
Than love I most these floures white and rede,
Soch that men callen daisies in our toun.

Here's a gorgeous yellow Gerbera, equally prolific this past summer:

Sunday, September 28, 2008

An American Hutong


This little lovely was found in my alley, poking out from the logs along my neighbor's fence. Reminded me of Tennyson. (Fear not; I did not pluck it.)


Flower in the crannied wall,
I pluck you out of the crannies,
I hold you here, root and all, in my hand,
Little flower -but if I could understand
What you are, root and all, and all in all,
I should know what God and man is.

Mums Galore!


Thought it was time to share pictures of some of my garden's flowers. I use a Kodak EasyShare CX7430. I'm not a photographer and I don't need or want a fancy camera. The Kodak suits me just fine. I will try to add more pictures in the coming days.

Sunday, April 13, 2008

A Word About Mini Stepping Stones and Trivets

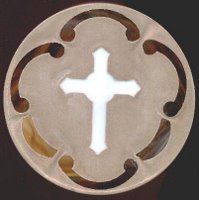
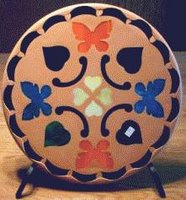
Eight-inch molds are available to make smaller versions of stepping stones. But these mini stones also make a distinctive trivet for your table. Just add some protective felt pads or plastic bumpons to the bottom of your mini stone. Even an apartment dweller can enjoy the beauty of a stained glass stepping stone!

Protective pads are readily available at most home improvement centers or craft stores. Bumpons can be purchased from picture framing companies.

That's pretty much it. Hope you have fun!

Tuesday, March 25, 2008

Installing Your Stepping Stone

By following a few simple instructions, your stepping stone will give you years of pleasure in your garden.

After you’ve treated your stone with a concrete sealer, it is ready to be installed in your garden. Dig your space deep enough to allow your stepping stone to sit flush with the ground. Put in a 1/2 inch bed of sand to provide a level surface, even weight distribution and good drainage. Set the stone in, fill in around the sides with soil, and you’re done!

It is recommended that you store your stepping stone indoors during extreme winter.

Thursday, March 20, 2008

Waterproofing Your Stained Glass Stepping Stone

While DiamondCRETE makes a waterproofing substance, I’ve never used it, so I can’t say how well it works.

I can say, however, that I have used Ducksback Waterproofer by Masterchem and love it. It’s available at any home improvement center or hardware store. It is a water-based product specifically for heavy duty concrete and masonry. It penetrates the stone, it doesn’t turn yellow, and it works. When brushing it on your stone, try not to get too much on the glass. And just be sure to wipe the glass immediately after getting it on there. It doesn’t really hurt it, but it makes it a little filmy and then you’ll have to scrub it off later. Catch it early and save yourself some work. Your brushes will clean up with soap and water.

Treat your stepping stones to this waterproofing once a year.

Monday, March 17, 2008

Removing Your Stone from the Mold


When the stone is ready to pop out of the mold, find a surface to place it where it won’t be disturbed. Lay some pencils down where the stone will cure. You’ll place your stone on those pencils which will allow air to flow under the stone and help it in its final stage of curing and drying.

Carefully turn the mold over and set it on the pencils. Then lift the mold. Your mold will probably come right off with little trouble. If it needs a little coaxing, press on the center very gently.

Immediately peel off the resist and wipe the glass. Sometimes the DiamondCRETE will seep under the edges of the resist a little bit, but this is not a problem. Just take a rag and wipe it away. Get the glass cleaned off real well. Then inspect the surface, especially between the pieces. You may notice a few little holes where air got trapped. Simply take a teaspoon full of dry mix, add a few drops of water to get a good consistency, and fill the hole. Wipe the stone smooth. That should do it!

Let the stone continue to cure undisturbed for a full month. After that time, it will have reached its full strength and will be ready for waterproofing.

Sunday, March 16, 2008

Cleaning Up While the Stone Cures

While the stone is curing, you can clean up your mixing bucket. Don’t clean and then pour into your plumbing system because it is, after all, a form of cement, and it can really gum up the works. You can allow it to set up and then break it out of the bucket later, but I always found this to be difficult. My favorite way to clean my buckets is to fill them with water and let them soak for a good long time. The concrete will settle to the bottom but won’t harden, you’ll be able to pour off the water, and you can wipe the sand and grit out of the bottom with rags or paper towels. Works like a charm!

Wednesday, March 12, 2008

Pouring the Concrete

Pour the mix slowly into your mold, making sure it flows in between all the pieces of glass in your mold but doesn’t cause the glass and resist to shift around. Then tap all around the mold to release any air bubbles that might have become trapped. These will rise to the surface and pop. You can also gently exhale on the bubbles to help them burst.

At this point, do not touch or move your mold. You need to let it sit and cure anywhere from one to three hours, depending on size and thickness. After you’ve worked with this for a while, you’ll get a sense of when it’s ready. But generally speaking, the stone will turn warm as it is curing. You’ll be able to feel the heat it puts out by just letting your hand hover close to the stone. When the stone is no longer putting out heat but starts to feel a bit cold, it’s getting close to ready to pop out.

Saturday, February 23, 2008

Mixing the Concrete

Let me say right off the bat, I don’t use traditional concrete mix and chicken wire to make my stepping stones. There are several reasons:

• I’m into instant gratification, and concrete just takes too long to suit me.
• You have to buy two different grades of concrete: a nice, super fine grade for the top third or so of the stone, and a coarser grade for the bottom two thirds.
• Mixing concrete is like rocket science to me; you have to add just the right amounts of everything to get it right. Forget it! Life is short. Remember the instant gratification thing.
• You need to embed chicken wire between the two grades of concrete.
• Concrete comes in one color. You can add colorants, but it’s a mess and inconvenient.

Another product available, but which I’ve never used personally is FlashCrete. You can check it out at http://www.anythinginstainedglass.com/mosaics/mosaics7.htm
It doesn’t require a sealant, but if you want colors, you have to add powdered colorant.

My experience is with a product called DiamondCRETE. While I can’t seem to find written verification of this, I was told that DiamondCRETE withstands 600 pounds per square inch (600 psi). Here’s why I like it:

• It requires and comes in one grade
• You add approximately 2 ounces of water to every cup of DiamondCRETE to get a thick milkshake consistency
• It’s pre-colored and comes in a wide variety of shades
• You can thoroughly mix the colors to get additional shades, or you can mix less thoroughly and produce swirled effects.
It sets up quickly. Very quickly. In anywhere from one to three hours, you can pop your stone out of the mold and let it continue to dry.

DiamondCRETE comes in 10 and 25 pound boxes as well as 60 pound buckets or boxes. You can purchase it at various craft stores such as Hobby Lobby, although they normally only carry the 10 pound size. It is also available through mail order.

The DiamondCRETE web site is located at http://www.diamondcrete.net/
and contains a wealth of information including mixing instructions and tips, troubleshooting, etc.

The total amount of water and DiamondCRETE you use will be dependent on the size and shape of your mold. Amounts needed for various sizes and shapes are listed on the DiamondCRETE boxes. Expect to use anywhere from 10 to 18 cups of DiamondCRETE per average project.

Put on your rubber gloves and dust mask, and measure out the water you need in one bucket. Using a different (dry) measuring cup, measure the DiamondCRETE into another bucket. Then pour about 1/3 of the water into a third, smaller container. Hold this back to add as needed, and bear in mind that you may not need all of it.

Gradually add the DiamondCRETE into the remaining 2/3 of the water and mix thoroughly using a paint stick or your gloved hand. I prefer to use my hand because the mixture will be thick and maybe clumpy. You’ll be able to feel those clumps and break them up with your fingers. Keep adding the DiamondCRETE until it’s very dry and hard to mix. Then gradually begin to add that last third of the water that you set aside in the small container and continue mixing. Keep adding water until you reach that thick milkshake consistency. There is some variation in how each of the colors mixes. Some colors will take less liquid than you’ve saved back. Don’t worry. You don’t have to use all the water because once you get to that milkshake consistency, it’s adequate. Too much water will make the mix too runny, and that will produce a weak stone.

When you’ve got it just right, then mix it like crazy for several minutes – but no more than five. This causes some sort of magical chemical reaction in the DiamondCRETE that will make it work right. That’s about as scientific as I’ll get on the subject. You’ll actually start to feel some heat from this reaction, and when you do, it’s time to pour.

Tuesday, February 19, 2008

Preparing the Mold

You now need to prepare the mold for pouring. Spread a very thin, smooth coat of petroleum jelly on the bottom and sides of the mold. Again, the shape of any lines or globs of jelly will transfer to the concrete. So you want to get the jelly as smooth as possible. It is not necessary to use a thick coat. As they say, “a little dab’ll do ya.” You can then place your glass and resist into the mold resist side down. When you look into the mold, the wrong side of the glass should be looking up at you, and the resist should be under the glass (between the glass and the mold). Place your mold where you plan to have it when pouring the concrete mixture. Use your level to make sure the surface is good and flat. Make adjustments as necessary so your stone will be an equal thickness on all sides.

The various layers of your stepping stone assembly from the bottom up are:
*Mold
*Petroleum jelly
*Resist (sticky side up)
Glass pieces (with the "right side down on the sticky stuff)
DiamondCRETE stepping stone cement

Thursday, January 18, 2007

Laying Your Glass on the Stepping Stone Pattern

Take the pattern/template which you trimmed to fit the mold. Lay it on a flat surface and begin to place your glass pieces on the design with the right side up and facing you as you work. Make sure all your numbers match. Again, you can use a touch of glue stick to hold the pieces in place.

You can now clean the numbers off the glass if you’d like. This is not super critical at this point because you can always clean them up later after the stone is poured.

When you have everything in place, cut a piece of resist or contact paper that is slightly larger than the size of the mold. Peel off the back to expose the sticky side and press it down smoothly and very firmly on top of the glass. Then trim away the excess resist so that it is the same size and shape as the template/frame. At this point, you can remove your paper template and put it aside. You can double check the fit of the resist and glass by picking up the resist, with the glass firmly adhered and flip it over, resist side down into the mold. Try to make the edges of the resist conform as closely as possible to the shape of the mold. Even though the resist or contact paper is very thin, it will leave a line in your concrete. The idea is to get that line as close to the edge of the stone as possible so it is virtually unnoticeable. If your glass pattern fits right up to the edge of the mold, you’ll never see the line. You can use your Exacto knife to trim the resist right along the edge of the glass. If you choose a pattern that has open concrete work as a part of the design, it is more important to match the shape of the mold as closely as possible.

Remove the glass with resist from the mold. Clean the wrong side of the glass (which is still exposed) very thoroughly, and then set it aside.

Thursday, November 23, 2006

Cutting the Glass for Your Stained Glass Stepping Stone

Precut glass shapes are available for use in creating designs. I'll post some sources for that later in the series. At this point, however, I’ll assume you’re cutting your own glass for your stepping stones.

Lay your individual pattern pieces on your stained glass. Either keep the pattern and glass with the right side up and facing you – or – put the pattern and the glass with the wrong side up and facing you. Be consistent. What you do with one, do with all. You might want to pay particular attention to any pattern or wave in the glass and lay your pieces out to capture that perfect swirl. For example, if you’re cutting out a flower, you may want the pattern in the petals to compliment each other or flow from one petal to another. The same goes for leaves. Don’t cut one piece with the pattern in the glass flowing across the leaf in an east-west direction and another with the flow of the glass going north-south. Of course, you may want that effect with certain patterns. Just be aware of these considerations as you lay your pattern out.

If you’d like, use a little spray adhesive or a touch of a glue stick to hold your pattern in place. Draw around the pieces and copy the piece number on to the glass with your marking pen. I try to remember to write the number on the side of the glass that will be facing up when the stone in complete. It makes cleaning it off later much easier.

Using your glass cutter, cut out all the shapes. Grind any sharp edges or go over them gently with a grozing stone. Work very carefully and watch out for those sharp edges! Clean the marking pen off the edges of the glass, but keep the numbers there for now.

Saturday, October 28, 2006

Printing and Cutting Your Pattern for Your Stained Glass Stepping Stone


Once you’ve chosen your pattern, print it twice: once onto a heavier stock of paper and once on regular paper. Assign a number to each piece in the pattern and write it on both copies. This assumes you’re using your computer printer. If you’re using a photocopier, you can write the numbers in first and then copy.

On the light weight copy, we will make a template in the shape of the mold. Stepping stone, trivet and coaster molds are available at craft stores or from stained glass suppliers, as well as online. They come in a variety of materials – heavy duty to light weight. Another very handy and inexpensive source for a stepping stone mold is the large, clear, lightweight plastic flowerpot saucer. These are available at any garden center. They are flexible and make removing your stone a piece of cake. Just make sure they are smooth bottomed without any pattern (unless you want that pattern on the top of your stone). To make the template, place the mold on the paper, making certain your pattern is centered, and draw the outline of the mold. You now have a “frame” around your pattern. Cut around this outline/frame and place it into your mold, making sure it fits neatly against all the edges. There’s a reason for this which will be explained later. Once you’ve got everything trimmed up correctly, remove this template from the mold form and set both aside.

Cut out your pattern on the heavier stock following the heavy black lines. If you have pattern scissors, use those. They will cut a channel between all the pieces in the pattern. If you don’t have a pair of these, use regular scissors and be sure to trim away all the black. Why? When making a stained glass panel, you join all the pieces together with came lead or copperfoil and solder. The channel cut between the pattern pieces allows for this added material. If you sew, think of it as the seam allowance. With stepping stones, you want the concrete to flow in between the pieces and act as the lead.

Stay tuned for more...

Monday, October 23, 2006

Making Stained Glass Stepping Stones - It All Starts with an Idea


And it’s called a pattern. It may be something you come up with in your own creative head. It may be a pattern designed by someone else and published in a book. It may even be a picture from a child’s coloring book (big pictures, thick lines)! Check out the pattern in that beautiful quilt that grandma made 40 years ago. Quilt patterns make beautiful stepping stones.

If the source of your pattern is something other than your own brain, be aware of copyright restrictions. These are usually stated in the front of the book. Some designers will only allow you to use their patterns to make stones for your own enjoyment or gift-giving. Some will allow you to sell what you make, but will restrict the number you can sell. Often, the author will ask you to call or write for permission. It’s easy to do the right thing and be legal while doing it.

There are also many resources on the internet for free patterns. Here’s a partial list to get you started.

Chantal's Stained Glass
Craft Patterns and Supplies, currently offering 4 free patterns if you do the printing from your computer.
Down East Stained Glass
http://stainedglasspatterns.com/
Craft Freebies - this is a fabulous source!