Friday, October 20, 2006

Tools of the Trade to Create Stained Glass Stepping Stones


Tools and accessories you use for stepping stone construction should be strictly designated for stepping stone work. Do not use any of the following items later (even after washing) for food preparation, food serving or food storage. Keep all items separate and for use only with your concrete.

You will need

Two large mixing buckets. 10 gallon plastic paint containers are more than adequate and are what I use when mixing for a large stone. Other favorites come from the local bakery where the containers have held the likes of corn syrup or baking mix. Sometimes these buckets are free. Sometimes the bakeries sell them for a dollar or two. Of course, there’s nothing wrong with a trip to the hardware store for a traditional metal bucket. They work too!
Medium sized mixing buckets. 5 gallon size containers are handy for mixing trivets.
A smaller container. Got margarine? A three pound plastic container is perfect for mixing trivets
Measuring cups. Two sets, metal or plastic. Both will work. One set is used for dry measuring, one set for water.
Measuring spoons. Again, metal or plastic.
A paint stir. If you’ve ever purchased paint, you’ve probably got a few million of these lying around. Wood or plastic. It’s all good. And free.
Rubber gloves. Cement mix is extremely abrasive and tough on the hands.
Dust Mask
Safety Glasses
A glass cutter, if you plan to cut your own glass shapes.
Running and/or breaking pliers, if you plan to cut your own glass shapes.
Sandblasting resist or heavy contact paper (I prefer clear).
Petroleum jelly
Scissors, pattern scissors, or an exacto knife
•Marking pen
•Spray adhesive or glue stick
•Paper
•A pattern
•Mold (the plastic type, not the penicillin type)
•Assorted stained glass
•Newspaper
•Level
•DiamondCRETE
•6 – 8 Pencils


Optional items

Handy if you have them, but not required:

• Glass Grinder
• Mosaic Cutter
• Reflective Tape (which might be optional depending on the type of glass you use.
• Grozing Stone (cheaper than a grinder and you can use it to abrade any edges that need it.

Some folks like to have an electric drill with a paint stir attached. I personally don’t recommend it. It adds far too many bubbles to the mix and unless you come up with a way to get all of them out before your concrete mix sets up, you risk a stone that is riddled with tiny air bubbles and is thereby weakened. Use those rubber gloves and get in there with your hands. You can then feel for clumps or areas that need more blending and mixing.

Stay tuned for the next installment!

Tuesday, October 17, 2006

Brands of Glass for Your Stepping Stones


Brands of Glass

These are the primary brands available, although you may not have access to all of them locally.
• Armstrong
• Bullseye
• CBS Dichroic
• English Muffle
• Chicago Art Glass
• Kokomo
• Optimum
• Oceana
• Spectrum (remember that coupon deal at Hobby Lobby)
• Uroboros
• Wissmach
• Youghiogheny
• Wasser

Also available are brands such as Pattern 80, Duncan Architectural, German New Antique, French New Antique, Lamberts, New Antique Mirror, Krosno, Saint-Just Antiques, as well as jewels, crystals, engravings, medallions, bevels in various lusters and clusters, and probably more.

Again, many of these brands will be carried at local retail stained glass specialty stores, but you’ll pay a premium for them. Some are positively gorgeous and worth every penny. But for starters, I’d still stick with Spectrum for all the reasons listed previously.

Opalescent glass works well and doesn’t need any special treatment when using it in a stepping stone. Since it is opaque, you won’t see concrete through the glass.

Cathedral glass, on the other hand, needs a special step. Venture Tape makes a product called BriteBak Reflective Tape. It comes in silver or gold and is extremely sticky. You can back your cathedral pieces with this tape to prevent concrete being seen through the glass and to produce a wonderful dimension to the glass. Read all about it here.

Sunday, October 15, 2006

Types of Glass and Your Stepping Stones

In a broad sense, there are two basic types of glass: cathedrals and opalescents, sometimes called opals. You will want to work a little differently with each when using them in stained glass stepping stones.

Cathedral glass, while colored or colorless, is transparent. In other words, you can see your hand through it. You can read a book through it, and you can see concrete through it. So, when using this type of glass in stepping stones, it is necessary, in my opinion, to back the glass with wide Venture Tape. More on that later.

Opalescent glass is more opaque. It comes as a solid color but also with several colors or shades mixed together to produce a beautiful pattern of waves and swirls.

Within each of these two categories are several sub-categories. In alphabetical order they are antique, Baroque, collage, crackle, dichroic, drapery, Flemish, foxtail, globs, glue chip, fibroid, granite textured, hammered, honeycomb, iridized, noogie, pinnacle, ring mottle, ripple, rondels, rough cast, rough rolled, seedy, slush, machine rolled smooth, smooth ripple, stipple, streakies, trapunto, wispy, and more. Some of these terms are used exclusively by one company or another, but the majority are fairly common to most.

When making stained glass stepping stones, smooth glass is preferred. I find Spectrum brand to be good for many reasons.

• It has a nice smooth texture which is particularly suited to stepping stones.
• It is reasonably priced.
• It cuts easily.
• There is a wide variety of pretty colors and types available.
• It’s made in the USA.
• It is easily accessible because it’s the brand that Hobby Lobby carries.

Unless you’ve got a wholesale account with a stained glass supplier, craft stores are a great source for manageable amounts of glass that won’t break the bank. Go to Hobby Lobby's website and sign up for a weekly email notification of their internet coupons. Or, if you prefer, click here to see what’s offered for the week. Sometimes, the week’s special is 50% off stained glass. Just print that coupon and take it to Hobby Lobby for a great deal. Buy one piece or buy 100. There’s no limit. Other times, a coupon for 40% off one item is offered. Also not a bad deal.

Next up: Brands of Glass for Your Stepping Stones

Saturday, October 14, 2006

Work Space for Creating Stained Glass Stepping Stones

The “Air” Apparent

Choose an area that is well ventilated. While it is fine to have a fan going while you cut glass or arrange pattern pieces, you will need to turn it off while pouring the dry concrete mixture into your mixing container. The dust is superfine, and moving air will stir it up even more. Wear a dust mask.

The Table

Table height is an individual thing based on your height. If you’re using a workbench or a regular table, the height will be predetermined for you. But if you’re tall, you might want a higher surface. Just remember that you’ll be standing most of the time (I’ve never been able to cut glass while sitting in a chair or on a stool). And you’ll be bending over when you pour. At least I find it necessary to work in these positions. Men’s center of gravity is in their shoulders or upper body, and they can pour a bucket of cement into a mold on a table much easier than a woman. Women’s center of gravity is in their hips, so pouring is more of a challenge. At least it is for me. With time, you will find what works best for you. But in the meantime, save your back and find a comfortable height for your work surface.

Indoors or Out?

The majority of us will probably be working indoors most of the time. When it comes time to pour the concrete, I always move to an area of the basement where I can clean up easily, or to the garage where a little spill would not be a catastrophe, or outdoors when the weather is nice. Of course, the great outdoors may be where you conduct most of this stepping stone business anyway, in which case, avoid windy days.

Work Safely While Making Your Stained Glass Stepping Stones


This may seem obvious, but it is absolutely crucial that you wear shoes while working with glass. Not sandals, not slippers, not open-toed fashion statements, and certainly not unprotected bare feet, but real, honest-to-goodness sturdy shoes which enclose your entire foot. You might even consider steel-toed boots.

I speak from experience, my friends. One day, while trying to salvage glass from a stepping stone damaged by a clumsy customer, a hairline crack grew into something much bigger. Half of an 18” concrete stepping stone fell off my work table and onto my sandaled foot. Not pretty. It took a full year and then some for my toenail to reach its previously healthy and attractive state. Naturally, I was working alone, but I managed to crawl to my bed and elevate my foot on the headboard without passing out. But it was close.

I made two mistakes. The first was not wearing a real shoe. The second was trying to salvage this stone. Take it from one who’s been there. If your stone is dropped and/or cracks for some reason, don’t try to save any of it. Take it straight to the dumpster and move on.

My point is simply this. Use common sense, be extra careful, and have a healthy respect for the damage that concrete and sharp glass can do to the human body. Keep young ones at a safe distance and insist that they also wear shoes if they are watching or helping. Tiny little pieces of glass that you may not see might end up embedded in the bottom of a foot. A nice crunch is a better sound than screams of agony. Stitches are no picnic for the injured party or the family member or friend who is there to watch the doctors work.

So, be safe and keep focused on the work before you, and you will hopefully avoid serious injury.

Friday, October 13, 2006

How to Make a Stained Glass Stepping Stone


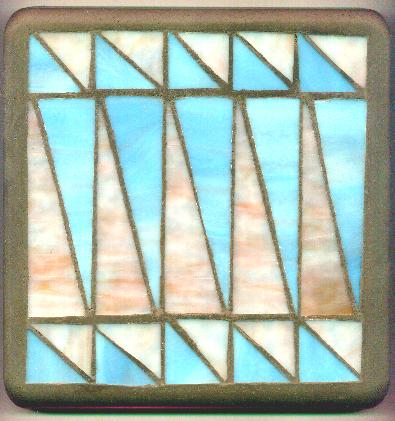
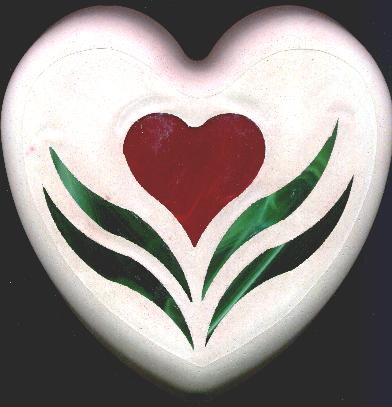
After receiving hundreds of requests for information and instructions on how to make garden stepping stones inlaid with stained glass, I decided to make this blog in order to explain the steps I take and the tricks I use to produce consistently successful results as seen here.

This blog is not meant to be an exhaustive resource, but rather it contains the secrets to my success. Included in future posts will be the brand names of the products I use, contact information for the companies which manufacture the materials needed, mail order sources, national retail suppliers which may be available to you locally, and techniques to help you make a beautiful stepping stone on the first try. I'll try to add a little bit each day, so keep checking back.

Upcoming topics:

  • Tools and Materials List
  • Instructions
  • Sources for supplies
  • Installation instructions
  • Internet resources


Tuesday, October 10, 2006

Stained Glass is My Passion

Stained glass has been an almost all-consuming interest of mine over several decades. Approximtely eight years ago, I turned my interest into an Internet business. My company is called Glassy Lady. I'm strictly an Internet business although I do sell at the occasional art and craft show.

I get quite a number of requests to share some of my trade secrets. While I'm not inclined to share all of them, I have decided to make this blog a place where I can talk about stained glass and share a few techniques that I've used over the years. My first topic will be making stained glass stepping stones. Stay tuned!