Friday, October 13, 2017

The Keyboard - Part Three

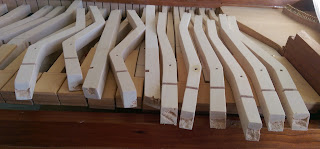
Since I've decided to roof the keys, I had to take some time to draw lines on all the keys to help guide my carving efforts.

The carving is done on the section of the key that is cranked sideways.  My keys came with pencil lines already drawn at the two "joints."  I added another line that is 1/4" inside of those two lines.  Rather than measure each and every line, I constructed a cardboard template that was the required width and worked through the keys individually by laying that template against the supplied pencil lines and drew.  It might have been quicker to put all the keys back on the rack and draw one long line with a straight edge, but to be honest, I just didn't think of it. 


Next, I drew a north-south line down the center of each key, connecting those horizontal lines. I eyeballed two center points (I'm very good at that) and used a straight edge to draw.


And finally, I made another template, this one 3/16" and used it to draw a line on the two sides of each key. I had some trouble wrapping my mind around that step, but the ah-ha moment arrived as sleep escaped me in the wee hours. Here's a typical key with all the lines drawn.


The idea, as I understand it, is to carve the wood from the side lines up to that center line and create a profile similar to a pointed roof.  I'm still puzzling over that quarter-inch edge at the top and bottom. It has been described as similar to the tip of a ski. Perhaps it will become clear as I'm drifting off tonight.

This whole undertaking promises to be quite an endeavor. Wish me luck!


The Keyboard - Part Two

Enough fussing over the keyboard!  A few of the naturals are a little heavy and don't pop back up when I depress them, but they're moving well, so I'm not overly concerned. I expect the keys to behave when I lighten them later on.  I have to admit that it bothered me for the longest time, but it pays to read ahead. (Actually, it pays to read the entire manual before beginning.)  I had a really hard time dealing with one key in particular that just didn't respond at all. I finally decided the balance pin was the culprit, gave it a tap to line it up better, and voila! Fixed. Everything is now moving in an acceptable way.

Time to add the cherry wood sharps. 

I laid a nice, perfectly-sized, heavy level across the keys, checked the distance between the white keys, making sure they were reasonably equal. Any that seemed off a little had their sides sanded to help even up those spaces or received a tap to their balance pin. Using the level's straight edge, I set the first and last cherry tops on the keys, keeping a 1/16" gap between the front of the sharp and the back of the cutout on the naturals and visually centering them between the neighboring naturals.The manual said to clamp the straight edge down, but for the life of me, I just couldn't see it.  The level had enough weight by itself. 


And by the by, there is a front and back to those sharps!


The glue went on those two sharps and I backed them up against the level/straight edge. I left them alone for 24 hours, just to be safe. The next day, I glued the remaining sharps, again taking care to visually center them between their neighboring naturals and butting the back sides up against the level. Easy. Again, another 24 hours to dry.


Next came rounding all the edges of the keys. The manual suggested using a mill bastard file, but ever the independent one, I turned again to my trusty Dremel and sanding sponges. Lots of dust, but the naturals all look really nice with their rounded, almost beveled edges. They look as if they are a bit worn from years and years of playing.  


The edges of the sharps were simply softened with the sanding sponge. I love them!  


I plan to sand all the keys with finer and finer grades of sand paper, but I'm waiting until I roof the keys.  Oh yes, I can't resist. I'll be roofing those babies!  When I am finished with that, I'll treat the key covers (both sharps and naturals) and key front moldings to a coat of tung oil - the same oil I used on the case.

As for the roofing....

I'm not a woodworker. I don't carve. But I just have to take this extra step. This will require a little bit of study on my part and probably a whole lot of time!  Stay tuned...


Friday, September 29, 2017

The Keyboard

I actually have spent an inordinate amount of time fiddling around with the keyboard. Every key has been lightly sanded on the sides to make them all nice and smooth and the little thumbnails were glued in and shaped. I used my trusty Dremel.


With the keys all returned to the rack, I looked for any that seemed to lean a little bit right or left, causing the spaces between the keys to be uneven. A little tap to the balance pins one way or the other helped. 

The north/south unevenness of the keys will be corrected later on when I balance them. But that's a ways down the road.


To help me get a good visual, I took the name board and fall board and laid them across the backs of the keys to hold them all down equally. 


Much better.


I'll probably do a little sanding on the sides of a few of the keys to even up a couple of spaces that still need some more help.  

Next came inspecting the ends of the (soon to be) black keys.  The ends of many of them were really chewed up, almost as if termites had been nibbling away.  


The manual says to make sure the ends look good.  The only fix was wood filler. Not a very good match, but I suspect those ends won't show very much, if at all. And I'm hoping the critical eye will be drawn to the pretty cherry wood tops that will be added next.